Preserve Spring Broccoli and Cauliflower

Broccoli and cauliflower are usually ready for harvest in Kansas and Missouri starting in May or June. Broccoli and cauliflower are high in vitamin C, fiber and many other nutrients. Both are popular raw, but are best preserved for later use by freezing. Neither broccoli nor cauliflower are recommended for home canning, except with the use of the pickled cauliflower recipe included in this newsletter.
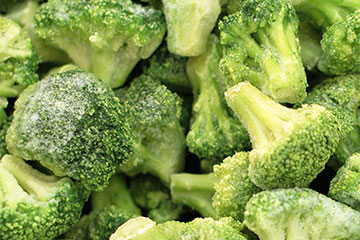
Freezing. Choose broccoli with firm heads and tender stalks. Remove all its leaves and woody portions. Separate the broccoli heads into small sections — spanning less than 1½ inches — and put them into a brine solution for 30 minutes to remove any insects on the vegetable. After brining, blanch the broccoli in water for 3 minutes, or steam blanch it for 5 minutes; cool the broccoli and drain it well before packaging it in an airtight container, leaving no headspace. Seal and freeze the container.
Select cauliflower with a compact head and remove all of its leaves. Cut the cauliflower into 1-inch pieces, and soak it in a brine solution for 30 minutes to remove insects. Drain the cauliflower, then blanch it for 3 minutes in water. Cool it immediately, then drain the cauliflower well and package it in an airtight container without any headspace. Seal and freeze the container.
Dehydration. While cauliflower can be dehydrated, most of the vitamin C is destroyed during the process of blanching and drying, so the quality will be poor. However, if you’re still interested in dehydrating cauliflower, wash the cauliflower and cut it into uniformly sized pieces. Small pieces dry quicker, thereby preserving better quality. Cauliflower requires 4 to 5 minutes of steam blanching, or 3 to 4 minutes of water blanching. It will take between 12 to 15 hours to dry. Cauliflower will be tough to brittle when fully dehydrated. Package dried pieces in tightly sealed containers and store in a cool, dark, dry place.
We do not recommend drying broccoli.
Blanching cleanses the surface of dirt and organisms, brightens the color and helps retard loss of vitamins. It also wilts or softens vegetables and makes them easier to pack.
Blanching time is crucial and varies with the vegetable and its size. Underblanching stimulates the activity of enzymes and is worse than no blanching; overblanching causes loss of flavor, color, vitamins and minerals. Follow recommended blanching times.
Source:
National Center for Home Food Preservation. n.d. “How Do I? … Freeze.” https://nchfp.uga.edu/how/freeze.html.
Say ‘No’ to Dry Canning

Simply put, so-called “dry canning” is not canning. True canning is defined by the heat processing of moist foods in closed containers to make them “commercially sterile” and vacuum-sealed for safe room temperature storage. Canning kills spoilage and pathogenic microorganisms that can survive at room temperature.
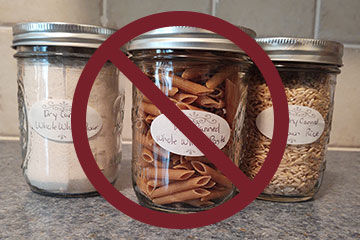
Still, the deceptively named dry canning method has been circulating online for a few years, calling for putting dried foods, such as grains, beans and nuts, into canning jars. Lids may or may not be applied to the jars before they are heated in a 200 degree F oven.
Don’t be misled. Dry canning is not “canning” just because it uses the word and canning jars. There are several issues with this dry oven concept, including:
- This method may not sterilize your food, though the jar lid may seal. A sealed jar lid does not necessarily mean the food is safe! You can’t know whether bacterial spores or mold spores have been killed using this method.
- This method does not remove all of the oxygen from the jar and could trap moisture from condensation.
- The dry oven process has never been a recommended canning method or a way to make a food shelf stable.
- The quality of the food may decline due to trapped moisture, rancidity from fat in the food or increased enzyme activity.
- The primary U.S. manufacturer of canning jars and lids does not recommend putting them in the oven.
- In the end, the method can be a waste of energy, time, food and equipment.
For more information on this method and to learn about recommended methods of long-term dry goods storage, see “Dry canning: NOT recommended” at https://preservingfoodathome.com/2020/04/16/dry-canning-isnt-canning-to-me/.
Source:
National Center for Home Food Preservation. 2020. “Dry canning: NOT recommended.” https://preservingfoodathome.com/2020/04/16/dry-canning-isnt-canning-to-me/.
Pickled Cauliflower
 Ingredients:
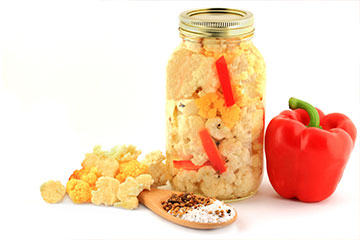
- 12 cups of 1- to 2-inch cauliflower flowerets
- 4 cups white vinegar (5% acidity)
- 2 cups sugar
- 2 cups thinly sliced onions
- 1 cup diced sweet red peppers
- 2 tablespoons mustard seed
- 1 tablespoons celery seed
- 1 teaspoon turmeric
- 1 teaspoon hot red pepper flakes
Yield: About 9 half pints
Instructions:
- Wash cauliflower flowerets, removing stems and blemished outer leaves.
- Boil in salt water — using 4 teaspoons of canning salt per gallon of water — for 3 minutes. Drain the cauliflower and cool.
- Combine vinegar, sugar, onion, diced sweet red peppers and spices in large saucepan. Bring to a boil and simmer 5 minutes.
- Distribute onion and diced pepper among jars.
- Fill jars with cauliflower pieces and pickling solution, leaving ½ inch of headspace.
- Using a boiling water canner or steam canner, process for 10 minutes (process for 15 minutes if elevation is above 1,000 feet). Store in a cool, dark location.
Source:
National Center for Home Food Preservation. 2018. “Preparing and Canning Pickled Vegetables: Pickled Cauliflower or Brussels Sprouts.” https://nchfp.uga.edu/how/can_06/pickled_cauliflower_brussel.html.