Steam Canning
 Steam canning, also known as atmospheric steam canning, is a great alternative to water bath canning for most high-acid foods with a pH below 4.6. Examples include most fruits, jams, jellies, pickled products, sauerkraut, preserves, salsa and acidified tomatoes. Steam canning uses less water, which reduces the canner weight and efficiently heats it up to temperature.
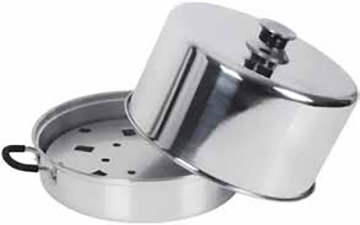
A steam canner has a shallow bottom pan (water reservoir), a vented rack where jars sit above the boiling water, and a domed (top-hat) top with vent holes near the base. As the water boils, steam fills the canner, surrounds the jars, and heats the jars of food. Steam has a higher heat-carrying capacity than hot water, allowing for efficient heat transfer throughout the canner.
Steam canning was developed in the 1920s, but was not widely used in home canning or recommended due to a lack of adequate research on safe processing times. Research done by the University of Wisconsin and the National Center for Home Food Preservation in 2015 validated that processing times for foods processed in a water bath canner are appropriate for steam canning when specific conditions are met:
- Use a research-tested recipe developed for water bath canning.
- Prepare jars and food according to research-tested recipe instructions.
- Allow the canner to vent steam from the holes on the side of the canner dome for at least one minute before starting processing time. Adjust heat to maintain a steady column of steam from the vent holes throughout the processing time.
- Processing time is limited to 45 minutes or less, including modifications for elevation. Steam canners can run dry if processing exceeds 45 minutes.
- Do not lift or remove the dome during the processing time for any reason.
After processing, turn off the burner and wait 5 minutes. Carefully lift the dome away from you and remove the jars to cool.
Learn more from Steam Can It Right! from the North Central Food Safety Extension Network.
Use Up Extra Fruit - Make a Fruit Shrub
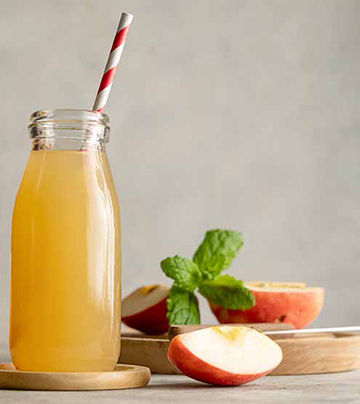 Fruit shrubs, also called drinking vinegars, are a delightfully sweet and tart mixer to a favorite bubbly water or beverage. Fruit shrubs use up small quantities of fresh fruit that may be wasted. The fruit shrub process takes 2 to 5 days, depending on how long you choose to let the flavors build.
For a small batch, use: ¼ pound chopped fruit, ½ cup granulated sugar, and ½ cup vinegar. Adjust the ratio based on your taste preference.
For a large batch, use: 1 pound chopped fruit, 2 cups sugar, and 2 cups vinegar. This will yield approximately 3 cups of the final fruit shrub.
Choose a vinegar that will complement the fruit. Options include apple cider vinegar; white, red or rosé wine vinegar; Champagne vinegar; and rice vinegar. Add more flavor with a splash of Balsamic vinegar.
Procedure
- Clean and sanitize the kitchen space - counters, sink and faucet.
- Wash your hands.
- Place fruit in a colander and rinse under cool, running water.
- Remove any stems, caps and pits from the fruit. Roughly chop the fruit.
- Transfer chopped fruit to a large glass jar with a lid.
- Wash your hands.
- Add sugar and gently mash fruit and sugar together to release fruit juice.
- Cover and let the fruit-sugar mixture sit for 15 to 30 minutes.
- Add fresh herbs and a pinch of salt, if desired, and stir.
- Cover and refrigerate the mixture for 1 to 2 days; stir or shake a few times each day.
- Add vinegar and stir to combine. Refrigerate 24 hours.
- Strain mixture through a sieve or cheesecloth. Press fruit to extract the juice. Transfer the fruit shrub to a storage container.
- Refrigerate the fruit shrub and use within 4 to 6 weeks. A suggested use is 1 part shrub to 5 parts sparkling water over ice. Adjust to your taste.
Bonus!
Prevent food waste by using the remaining fruit pieces after straining to make a sweet, tangy dressing for fresh greens or vegetables. Pureé or blend the fruit with your favorite oil, and season with herbs or spices. Enjoy!